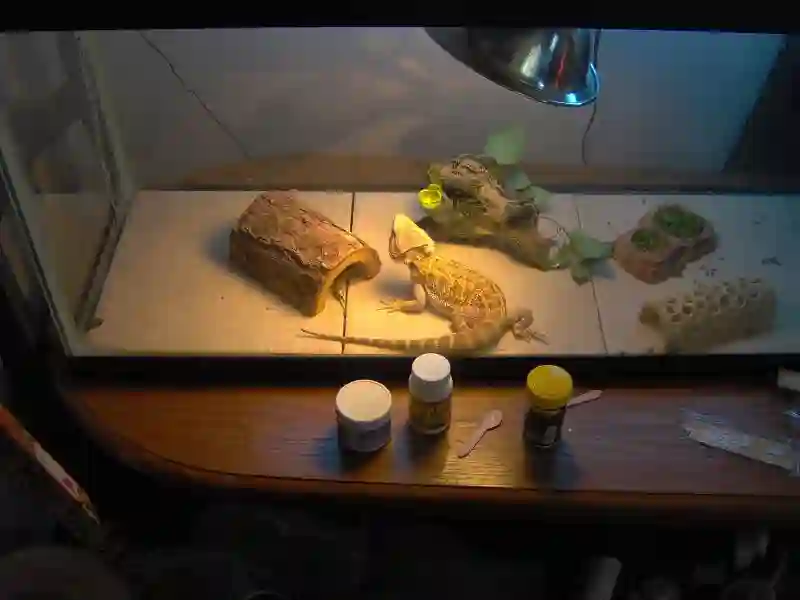
Bearded dragons are an increasingly popular pet and for good reason. With their bright colors, curious personalities, and relatively low-maintenance lifestyle, there’s no wonder they’re growing in popularity.
But taking proper care of these lizards requires more than just providing food and water; they need a safe and comfortable place to live. Building your own cages is a great way to ensure your dragon is living in a space that’s just right for them.
In this article, we’ll discuss How to Build Your Own Bearded Dragon Cages. We’ll cover the materials and tools you’ll need, as well as the step-by-step process for creating a safe and comfortable environment for your bearded dragon. With the right guidance, you can create the perfect home for your dragon in no time!
Gather the Necessary Supplies
Once you have gathered all the necessary supplies, it is time to set up your terrarium. The cage should be large enough for the specific type of reptile you are housing. Additionally, the enclosure must provide adequate ventilation.
The substrate should be appropriate for the species and should be changed regularly. Lastly, make sure to include the correct lighting and heating systems for your reptile, as this is critical for their health and well-being.
Cage
Now that you have a clear idea of what kind of reptile you want to adopt, it is time to gather the necessary supplies. To start, you need to invest in a suitable cage for your new reptile. Below are some points to consider when selecting a cage.
| Size | Material |
|---|---|
| Make sure the cage is large enough for your reptile to move around and explore. | Choose a cage that is made of a material that won’t be harmful to your reptile. |
| Look for cages with multiple levels, so your reptile has space to climb. | Opt for a cage with a secure lid to prevent your reptile from escaping. |
| Choose a cage with secure locks or clasps to prevent your reptile from opening it. | If your reptile lives in a moist environment, consider purchasing a glass cage to help retain humidity. |
| For larger reptiles, opt for a cage that is easy to move and transport. | Make sure the cage has access to proper ventilation, and is not placed in direct sunlight. |
In addition to the size and material of the cage, there are other features you should consider when selecting a cage, such as:
- Accessories:
- Look for cages that come with accessories such as climbing branches, plants, and decorations.
- Choose a cage with shelves, ramps, and other surfaces that your reptile can use to climb.
- Look for cages with hideouts and caves, so your reptile can rest and feel safe.
- Cleaning:
- Choose a cage that is easy to clean and maintain over time.
- Invest in a cage with removable parts, so you can easily reach all the surfaces.
- Look for cages with detachable floors, so you don’t have to clean the entire cage every time.
- Price:
- Look for cages that meet your budget.
- Compare prices between different brands and materials.
- Invest in the best quality cage that you can afford for your reptile.
By considering all these factors, you will be able to select the best cage for your reptile.
Substrate
Having the right substrate for your reptile cage is essential in providing a healthy and comfortable environment. A good substrate will not only provide a natural space for your reptile to live but also be safe for them to use. Here are the different types of substrates you should consider when setting up your reptile cage:
| Substrate | Overview | Usage |
|---|---|---|
| Premium Reptile Carpet | Soft and thick carpet material | Good for desert-dwelling reptiles, such as lizards |
| Paper Towel | Absorbent material | Easy to clean, great for short-term housing of reptiles |
| Cypress Mulch | Soft and absorbent wood chips | Good for desert dwelling reptiles, such as lizards |
When choosing a substrate, consider the type of reptile you have, as well as its environment. For example, humidity-loving reptiles should be kept on a substrate that can hold moisture, such as premium reptile carpet or cypress mulch. On the other hand, desert-dwelling reptiles should be kept on a drier substrate, such as paper towels.
Also, consider the ease of cleaning the substrate. For example, paper towel is the easiest to clean, while cypress mulch is the most difficult. Here is a list of things to consider when choosing the best substrate for your reptile cage:
- Type of Reptile:
- Humidity-loving reptile
- Desert-dwelling reptile
- Substrate Ease of Cleaning:
- Easy to clean
- Moderately easy to clean
- Difficult to clean
By taking the time to consider these factors, you will be able to choose a substrate that is both safe and comfortable for your reptile.
Lights

Moving on from the cage and substrate, lighting is a critical component of any reptile enclosure. It is important to find the right type of light for the species you are keeping, as well as to make sure that the wattage and temperature are appropriate.
Below is a table that outlines the best lighting options for reptiles, along with a few key features:
| Light Type | Wattage & Temperature | Benefits |
|---|---|---|
| Fluorescent | Low to medium, depending on species. Lower temperatures for nocturnal species, while higher temperatures for diurnal species. | Inexpensive and easy to install. |
| Metal Halide | Medium to high, depending on species. Higher temperatures for diurnal species. | High efficiency, long-lasting, and easy to install. |
| LED | Low to medium, depending on species. Lower temperatures for nocturnal species, while higher temperatures for diurnal species. | High efficiency, long lasting, and easy to install. |
In addition to the type of light, there are a few more factors to consider:
- Wattage:
- Too little wattage will not provide enough heat to the enclosure.
- Too much wattage can quickly overheat the enclosure.
- Temperature:
- Too low of a temperature can cause metabolic problems.
- Too high of a temperature can cause overheating and even death.
- UVA and UVB:
- UVA and UVB help to maintain reptile health and stimulate appetite.
- Species that are active during the day require higher levels of UVB.
In conclusion, it is important to choose the appropriate light to ensure the health and well-being of your reptile.
Determine the Size of the Cage
Now that you have all the supplies necessary, it’s time to decide on the size of the cage. This is a very important decision and should not be taken lightly, as it will determine the amount of space that your pet has to move around, explore and exercise.
The first factor to consider is the size of the pet. Smaller animals such as mice or hamsters require smaller cages, while larger animals such as guinea pigs or rabbits require much larger cages.
In addition, the number of pets should also be taken into account when determining the size of the cage. If you are housing multiple pets, then a larger cage is necessary to provide adequate space for all animals.
It’s also important to note that if you are housing multiple pets in the same cage, it is essential to ensure that the animals are of a similar size and temperament.
Consider the individual needs of the animals and make sure that the cage is large enough to provide enough space for all of them to move around and explore. With the right size cage, you can ensure that your pet is happy and healthy.
Construct the Frame
Now, let’s move on to the Types of Framing Materials needed for the construction. After that, we will discuss the Measurements and Dimensions of the frame. Finally, we will explore the steps to Assemble the Walls.
Types of Framing Materials
Now that we have the measurements and dimensions for our frame, it’s time to choose the types of framing materials that will be used. The most common materials used for framing are wood, metal, and plastic.
Each of these materials has its own set of advantages and disadvantages, so it’s important to take them into account when selecting the material for the frame.
| Material | Advantages | Disadvantages |
|---|---|---|
| Wood | Inexpensive, Easily Available, Easy to Work With | Susceptible to Water Damage, Not Rust-Resistant |
| Metal | Strong and Durable, Rust-Resistant | Expensive, Hard to Work With |
| Plastic | Inexpensive, Lightweight, Rust-Resistant | Susceptible to Sun Damage, Not as Strong as Wood & Metal |
When it comes to choosing the best material for the frame, it is a matter of personal preference and budget. To help you make the best decision, here is a list of the advantages and disadvantages of each material:
- Wood
- Advantages: Inexpensive, Easily Available, Easy to Work With
- Disadvantages: Susceptible to Water Damage, Not Rust-Resistant
- Metal
- Advantages: Strong and Durable, Rust-Resistant
- Disadvantages: Expensive, Hard to Work With
- Plastic
- Advantages: Inexpensive, Lightweight, Rust-Resistant
- Disadvantages: Susceptible to Sun Damage, Not as Strong as Wood & Metal
Once you have chosen the best material for the frame, you can move on to the next step of assembling the walls.
Measurements and Dimensions
With the measurements and dimensions settled, it was time to start constructing the frame. To begin, all the necessary materials had to be gathered. This included a selection of framing materials such as wood, metal, and bamboo.
| Material | Quantity | Size |
|---|---|---|
| Wood | 3 pieces | 2 inches x 4 inches |
| Metal | 4 pieces | 6 inches x 2 inches |
| Bamboo | 6 pieces | 1 inch x 4 feet |
The frame had to be measured out precisely, and the materials had to be cut to the correct dimensions. For this project, the dimensions were:
- Height: 6 feet
- Length: 8 feet
- Width: 4 feet
- Front wall: 4 feet x 6 feet
- Back wall: 4 feet x 6 feet
- Right side wall: 8 feet x 2 feet
- Left side wall: 8 feet x 2 feet
Once the materials had been correctly measured and cut, it was time to assemble the walls.
Assembling the Walls
Now that the size of the cage is determined, it’s time to construct the frame. Assembling the walls requires the right materials to ensure safety and durability. Below are the materials needed, the measurements and dimensions to fit the cage, and instructions on how to assemble the walls.
| Materials | Description |
|---|---|
| Wooden boards | Utilize straight, smooth, and lightweight boards of equal size to construct the walls. |
| Screws | Use ½” to ¾” screws to attach the boards together. |
| Nails | Use ¾” to 1″ nails to attach the boards to the frame. |
| Staples | Use ¼” staples to secure the fabric to the frame. |
To ensure accurate measurements, the following dimensions must be taken into account:
- Height: Measure the height of the cage from the ground up to the top.
- Length: Measure the length of the cage from one side to the other.
- Width: Measure the width of the cage from the front to the back.
- Bar Spacing: Calculate the bar spacing between each wooden board.
- Bar Thickness: Calculate the bar thickness of each wooden board.
- Bar Length: Calculate the bar length of each wooden board.
Once the measurements have been taken, it’s time to assemble the walls. To do so, follow these steps:
- Cut the wooden boards according to the measurements.
- Attach the boards together using screws.
- Secure the boards to the frame using nails.
- Staple the fabric onto the boards to cover the walls.
Once the walls are assembled, the frame is complete.
Cut and Install the Mesh
Now that you have constructed the frame, it is time to cut and install the mesh. This is a crucial step that whether done properly or not, can drastically alter the look and feel of the project. It is important to be thorough and precise when making these cuts, as the mesh will be acting as the primary support for the entire structure.
Start by measuring the mesh against the frame and mark the necessary cuts. Depending on the size of the mesh, it may be necessary to use a utility knife or hacksaw to make the cuts, as scissors may not be able to provide a clean cut.
It is important to take caution when using these tools, as they can be dangerous. Make sure that the surface you are working on is stable and that you are wearing the proper safety gear.
Once the mesh has been cut to size, it is time to install it on the frame. Using a stapler or nails, attach the material to the frame. When stapling, make sure to evenly space the staples and that the material is taut. If using nails, make sure to secure them firmly.
Create the Door
In order to create the door, it is essential to first measure, then cut, and finally align the pieces. Accurate measurements will help ensure the door fits its frame perfectly. Once the pieces are cut, alignment is key for a seamless installation.
Measuring
Now that we have cut and installed the mesh, it’s time to create the door. Measuring is the first step to ensure that we have the correct size and shape for the entire door. Accurate measurements are critical in order to create a door that will fit the desired space.
- Before measuring, it’s important to keep in mind the following information:
- Take a few measurements to ensure accuracy
- Draw out a diagram of the door to note the measurements
- In order to get started, you’ll need the following materials:
- Measuring tape
- Pencil
- Paper
It’s vital to take the time to measure the door properly. To do this, measure the width of the door frame and write this number down. Then, measure the height of the door frame and record this number. Finally, measure the thickness of the mesh and write this number down as well. Once you have recorded all of the measurements, you can move on to the next step.
Cutting
Now that the mesh is securely installed, it’s time to cut it to create the door. When cutting the mesh, it’s important to make sure that you measure, cut, and align correctly. This will ensure that the door fits properly and securely.
To begin cutting the mesh, there are three main steps:
- Measuring
- Measure the opening of the door to determine how much mesh is needed
- Mark the area to be cut
- Cutting
- Cut the mesh to the size of the opening
- Cutting the mesh is best done with wire cutters
- Aligning
- Cut the mesh to the size of the opening
- Align the mesh to the door opening and secure it
When cutting the mesh, it is important to be precise and have a steady hand. You want to make sure that the cuts are correct and the mesh fits properly. If the mesh is cut too small, it will not fit. If it is cut too large, it will be more difficult to secure.
Aligning
Now that the mesh is cut to size, it’s time to align it with the door frame. Aligning the mesh is an important step to ensure that the door will fit properly and securely.
- First, use a level tool to make sure the surface of the door is even.
- Then, adjust the mesh accordingly:
- Make sure the mesh is centered in the door frame.
- Ensure that the mesh is aligned at the top, bottom, and sides.
- Check the mesh is flush with the door frame.
- Finally, securely fasten the mesh to the door frame using the appropriate screws.
Once the mesh is properly aligned and securely fastened, the door is ready to be hung.
Add the Substrate
Now that the door is complete, it’s time to add the substrate to the structure. The substrate is an important component of the door, as it is the material that the door will be mounted on.
Adding the substrate is an easy process that does not take much time. The first step in adding the substrate is to measure the area of the door that needs to be covered. This will ensure that the substrate is the right size for the door.
After measuring the area, the substrate can be cut to size and then applied to the door. The substrate should be applied evenly and firmly so that it is securely attached to the door. Once the substrate is applied, the door can then be mounted and the door is ready for use.
Add Accessories
When it comes to adding accessories, it is important to focus on the cage size, lighting, and substrate. These three factors play an important role in creating a comfortable environment for your pet. With the right combination of these three elements, your pet will be able to thrive in its new home.
Cage Size
Now that your habitat is outfitted with the substrate, it’s time to consider the size of the cage you’ll need. Choosing the right size cage is critical to the health and happiness of your pet. Here are some key points to consider when selecting the right size cage:
- Consider the size of your pet:
- Smaller animals such as hamsters, gerbils, and mice will need a smaller habitat than larger animals like rabbits and guinea pigs.
- Think about how much space your pet needs to move and play in.
- A larger habitat provides more space for your pet to explore.
- Think about the size of your living space:
- If you live in an apartment, a smaller cage may be the best option.
- If you have a larger living space, a larger habitat may be beneficial for your pet.
- Take into consideration the kind of activity your pet needs and the space you have available.
- Research the size of cages available:
- Look for cages that are specifically designed for your pet.
- Research the size dimensions of the cage and make sure it fits the space you have available.
- Compare the size of cages that are available to make sure you get the right one for your pet.
The right size cage can make a world of difference to your pet. When selecting the appropriate size, you should consider the size of your pet, the space you have available, and the size of the cages that are available. Doing your research will ensure you make the right decision for your pet.
Lighting
Now that you have the cage size and substrate ready, let’s move on to adding the right lighting for your pet. Lighting is an important factor in keeping your pet healthy and comfortable. Here are some tips for choosing the right lighting for your pet:
- Type of Light:
- For a tropical habitat, choose full-spectrum fluorescent bulbs, as they provide the right spectrum of light and heat.
- If keeping a desert reptile, select a light-emitting diode (LED), which provides the proper level of light and heat.
- Duration of Light:
- Reptiles require a 12-14 hour light cycle to replicate their natural environment.
- You can use a timer to ensure the light cycle is kept consistent.
It’s also important to place the lighting at the right distance from the enclosure, as too much heat can be harmful to your reptile. When selecting lighting, always consider the natural environment of your reptile and choose accordingly.
Substrate
Now that you have considered cage size and lighting, it’s time to add the substrate to your pet’s habitat. The substrate, which is the material that lines the bottom of a reptile’s habitat, is an important component. It provides traction, absorbs waste, and creates an aesthetically pleasing environment. Below are three of the most popular substrate options for reptile habitats.
- Organic Substrates
- Cypress Mulch – A natural, wood-based substrate with a pleasant odor.
- Soil and Sand Mix – A blend of soil and sand that provides natural traction.
- Coconut Husk – A soft and absorbent substrate made from coconut husk.
- Inorganic Substrates
- Newspaper – An inexpensive and easy-to-clean substrate that’s not aesthetically pleasing.
- Reptile Carpet – A carpet-like material made from synthetic fibers.
- Tile – A hard and easy-to-clean substrate that requires frequent replacement.
- Faux Substrates
- AstroTurf – An artificial grass with a grass-like texture.
- Bark Chips – A wood-based product with a natural appearance.
- Reptile Bedding – A paper-based product with an absorbent texture.
When selecting a substrate, consider factors such as the size of your pet, the type of enclosure, and the desired aesthetic. Some substrates are better suited for certain types of reptiles, so it’s important to do your research and select the most appropriate option. Ultimately, the right substrate will keep your pet happy and healthy.
Install the Heating System
When it comes to installing the heating system, there are three main steps to consider: choosing the heating system, installing the heating system, and connecting the electrical supply. Each of these steps requires careful consideration and precision to ensure a successful installation.
Choosing the Heating System
Now that the accessories are installed, we move to the next step in the process: installing the heating system. Choosing the right heating system is essential for ensuring that your home is both comfortable and energy efficient. To ensure that you make the best choice for your home, consider the following factors when selecting a heating system:
| Factor | Description | Example |
|---|---|---|
| Fuel Source | The type of fuel used to power the heater | Natural gas, propane, electricity, etc. |
| Heating Capacity | The amount of heat the heater can generate | BTU (British Thermal Unit) |
| System Design | The type of system used to distribute heat | Forced-air, radiant, etc. |
| Energy Efficiency | The amount of energy needed to generate heat | AFUE (Annual Fuel Utilization Efficiency) |
| Maintenance Requirements | The amount of time and resources needed to keep the heater running efficiently | Filter replacements, annual tune-ups, etc. |
By taking these factors into consideration, you can be sure to select the best heating system for your home that meets your needs and budget.
Installing the Heating System
Once you have chosen the heating system for your home, it’s time to install it. Installing a heating system is a complex task that requires skill and knowledge of the specific system you are installing. In this section, we will cover the steps for installing the heating system.
| Steps | Description | Tools |
|---|---|---|
| 1. Prepare the space | Ensure the area is clean and free of debris. | Vacuum, broom, dustpan |
| 2. Mount the unit | Secure the unit to the floor or wall. | Screwdriver, drill |
| 3. Connect the unit | Connect the unit to the ductwork. | Duct tape, pliers |
It is important to follow all instructions carefully when installing the heating system. If the installation is done incorrectly, it could result in significant problems, so it is best to follow the instructions provided by the manufacturer. Additionally, it is important to wear the appropriate safety gear when installing the system, such as gloves, goggles, and dust masks.
Connecting Electrical Supply
Now that you have chosen the heating system for your home, it’s time to install it and connect it to the electrical supply. Connecting the electrical supply is a vital step as it powers the system and allows it to run properly.
| Step | Action | Note |
|---|---|---|
| 1 | Find the circuit panel | Ensure the circuit breaker is off |
| 2 | Check the amperage | Ensure the amperage is not overloaded |
| 3 | Connect the wiring | Be sure the wiring is connected securely |
Once you have located the circuit panel, checked the amperage, and connected the wiring, it is essential to test the connection. You should ensure the connection is secure and that the amperage is within the recommended limit.
It is also recommended to hire a licensed electrician to carry out a safety inspection. This is important so that you can comfortably rest assured that your heating system is installed correctly and running safely.
Monitor the Humidity Levels
Now that the heating system is installed, the next step is to monitor the humidity levels. Proper humidity levels in a home are essential to the comfort of its occupants, as well as the health of a home’s infrastructure. It is important to monitor the humidity levels to ensure that all aspects of the home are healthy and functioning properly.
Humidity levels should be monitored on a regular basis. This can be done in a variety of ways, such as using a digital thermometer, a hygrometer, or a combination of both. Digital thermometers measure the ambient temperature and the relative humidity of a room, while hygrometers measure the absolute humidity of a room.
Depending on the size of the space and the desired accuracy of the results, one or both of these tools may be necessary to accurately measure the humidity levels in a home.
Once the levels are established, it is important to monitor them over time. This can be done manually, or by using a home automation system that is capable of keeping track of the humidity levels.
By doing this, it is possible to detect potential problems with the heating system before they become too serious. Additionally, this will help to maintain the desired level of comfort within the home for its occupants.
Finalize the Setup
Now that the humidity levels are being closely monitored, it’s time to finalize the setup. To do so, the following steps must be taken:
Step 1: Test the accuracy of the measurements and ensure that the humidity levels are being accurately measured. This will help in getting the most accurate readings in the future.
Step 2: Set up alarms and notifications so that it is possible to be alerted when the humidity levels go above or below the predetermined thresholds. This will ensure that the appropriate actions can be taken in a timely manner.
Step 3: Document the entire process for future reference. This will help in making sure the setup is easy to understand and use for any new team members or personnel who take over the responsibility of monitoring the humidity levels.
Finally, it is also important to regularly review and update the setup to ensure that it is always up-to-date and accurate. By doing so, it will be possible to consistently keep track of the level of humidity and take corrective action whenever necessary.
Conclusion
Building a bearded dragon cage requires planning and preparation. With the right supplies and instructions, it is not an impossible task. First, the size of the cage should be determined to make sure that it is adequate for the size of the bearded dragon.
The frame and mesh should then be cut and installed, followed by the addition of the substrate, accessories, and heating system. Lastly, the humidity levels must be monitored to ensure the bearded dragon’s health and safety.
With patience and dedication, a comfortable and secure home for your pet can be created. It can be a rewarding experience to build a cage for your beloved bearded dragon. It is important to make sure the cage is safe and comfortable for them to inhabit.